
Your Cart is Empty
CREATING FESTIVAL ACCESSORIES!
Now that you have created your festival wellies, who doesn't want a coordinating tote bag and water bottle!
The flexibility of the products you have bought will allow you to work on all three very different surfaces and still get surprisingly amazing results! Fabric, rubber and plastic!
We used these products listed below to help us create our wellies, tote bag and water bottle.
- Marabu Yono Markers set of 4 Bullet Tip (1.5-3mm) - Neon
- MARABU YONO MARKERS BULLET TIP (1.5-3MM)
- Marabu Yono Markers Set of 12 Bullet Tip (1.5-3mm) - Assorted
- UNI POSCA MARKERS BOLD PC-8K
- UNI POSCA MARKERS FINE PC-3M (this size has glitter options)
- Winsor & Newton Disposable Tear Off Palettes (9" x 12")
- Scotch Masking Tape
- ARTdiscount Acrylic Brush Set of 5 Brushes
- Faber-Castell PITT Artists Pens - PITT Drawing Pens
- Americana Multi-Surface Premium Acrylics- 59ml
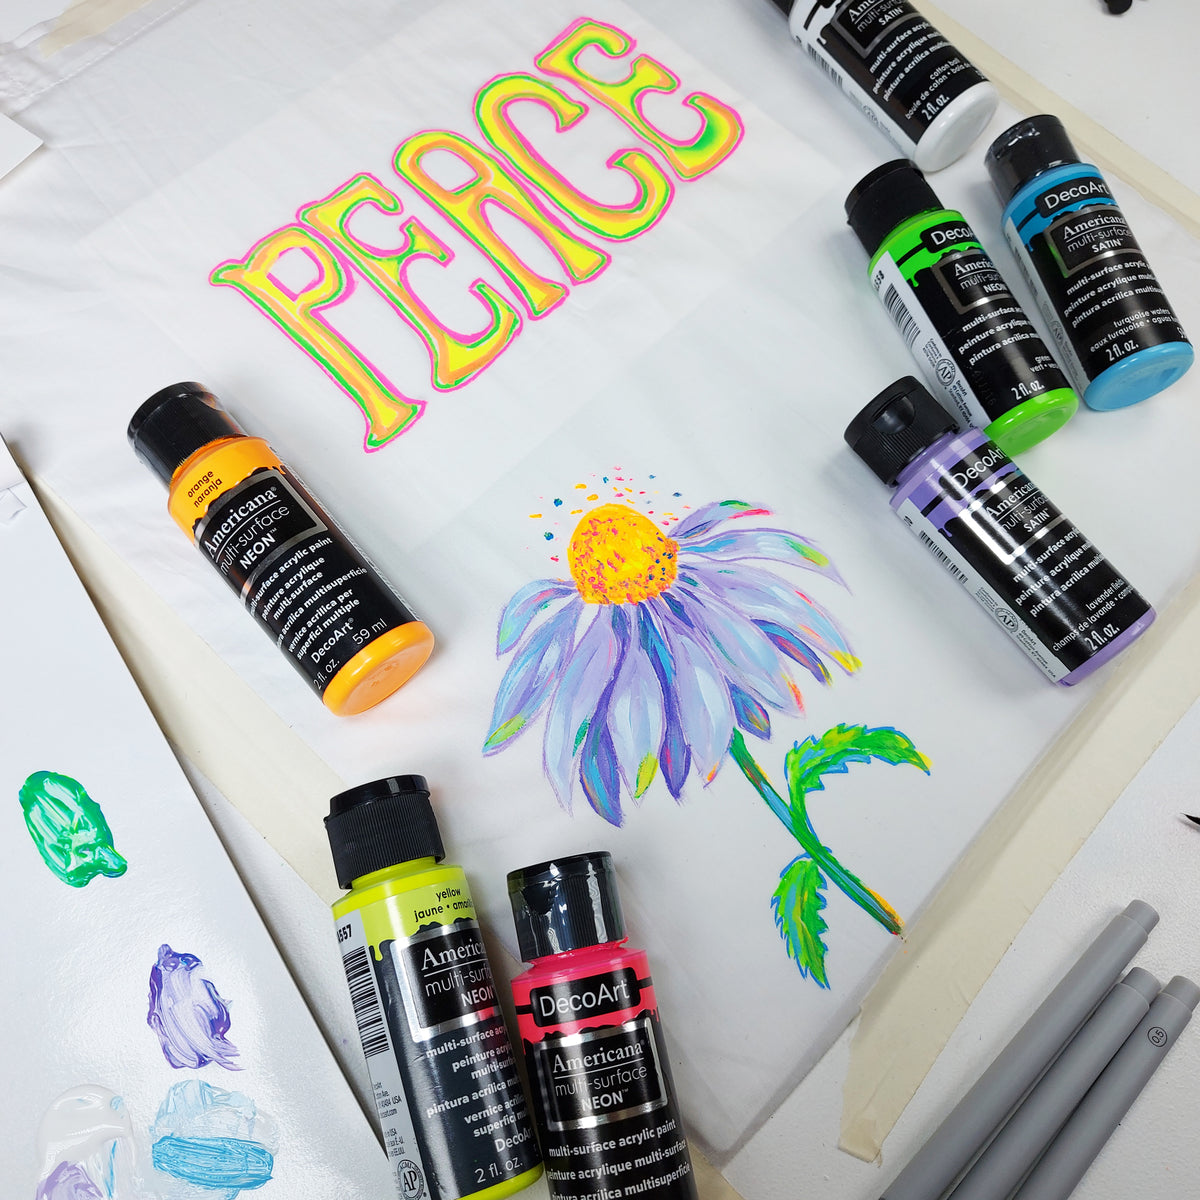

Americana Multi-Surface Premium Acrylics- 59ml
Pigments used:
- Cotton Ball White
- Turquoise Waters
- Neon Pink
- Neon Orange
- Neon Yellow
- Neon Green
- Neon Blue
- Lavender Fields
- Iris

STEP by STEP Tutorial
This is how we achieved great results with our tote bag and water bottle.
Prep the studio space or kitchen table.
- Create a dust-free, clean space in which to work and protect all your surfaces. Maybe wear an apron to protect your clothing.
- Have a small water pot at hand, maybe a water spray, lots of paper tissue for mopping up and for cleaning brushes. Top tip, cotton buds are great for cleaning small and tricky edges of your design, dip them in water before tidying up the edges. If you want to create some texture in your design, have some synthetic sponges at hand also. Either dip your sponges in multiple colours and dab softly on your surface, or load up your sponge and work in layers. Let each layer dry before applying the next if you want to control your colour combinations.
Prep your water bottles, tote bag etc…
- Make sure your water bottle is clean and grease free, wipe down with a clean damp cloth. Try to find a plastic water bottle that doesn't flex too much when handled, a hard plastic one would be easier to paint on and for the paint to adhere to. All non porous and hard surfaces should be clean and grease free, this will allow the paint to adhere to the surface. Mild soap and water and a damp lint free cloth will be fine to use. When painting onto fabric, wash the fabric first to remove any size, this will allow the paint to sink down into the fibres.
- If you have washed your tote bag make sure it is dry and ironed flat. Creases will make it hard to paint sharp edges and lettering.
- When painting onto fabric make sure you have a piece of cardboard in between your bag or t-shirt to prevent bleeding onto the fabric layer underneath, don’t dilute the colours, work with the colours straight out of the pots. The acrylic markers and the AMERICANA MULTI-SURFACE PREMIUM ACRYLICS - 59ML paints work really well together on most surfaces, fabric, plastic and rubber. These paints also stay open for a long time, won’t dry up and are really easy to use with a soft synthetic brush.
- Lay your tote bag flat onto your table with the cardboard or foam board inside then using masking tape, tape all edges down to prevent movement whilst drawing and painting.
Prep your designs and motif!
- Before embarking on painting your Tote Bag or Bottle, aim to practise drawing and painting several different designs and colourways to make sure the scale of your designs are right for your project. Working on plain White or Black fabric provides a good base for a design. Prepping designs in this way is a great rehearsal for mark making and choosing your colour palette and for mixing colours.
- We have chosen to use the same designs as we used on the Wellington boots for our tote bag and water bottle so they all coordinate. You can do this by practising on a piece of paper and laying your designs on your tote bag or tape the paper design around your water bottle to see if the scale is right before committing to the final design!
- Decide where you are going to start! We started by drawing the word Peace at the top of the front of the bag. This helped whilst planning the scale of the flowers, hearts and bees. You can print off the word and then place the word underneath the fabric and use it as a template to work over with the markers. Also using a ruler to mark down from the top of the bag and sides will also help centre your Logo.


Techniques you can use...
- If you aren confident at free hand painting, aim to use some cut out stencils. Just normal photo copy paper can be used to make the stencils as the paper is thin and will bend around the bottle easily. Print out your favourite flower or shape several times in various scales and cut out some petals and the stem. Use a soft brush or sponge dipped in the paints, you will need to let each layer dry before you apply the next. Make sure you cover all the areas you do not wish the paint to go. Sponging different colours on each of the layers is a fun way to create a glowing Neon texture. You can add detail with the Yono markers when the paint has dried.
- Or Use the marker pens to create outlines then block-paint in all the areas you want to colour. The two products we have listed work really well together as they both provide the same shades of neon colours. AMERICANA MULTI-SURFACE PREMIUM ACRYLICS - 59ML and Marabu Yono Markers set of 4 bullet tip (1.5-3mm) - neon. The paints don’t need to be diluted and can be used straight out of the tubs.
- These paints also stay open and are really easy to use. You may need several layers to create an opaque style or use a combination of translucent and opaque?
- We used a Faber-Castell PITT Artists Pens - PITT Drawing Pens to create the little bee illustration and added colour with the Neon Yono and Posca markers on our Tote Bag.
- We used a Faber-Castell PITT Artists Pens - PITT Drawing Pens to create the little bee illustration and added colour with the Neon Yono and Posca markers.
Making your designs Permanent.
- On our hard plastic Water bottle we used the Americana Paints, Posca and Yono markers. To achieve the best results, let each layer of paint dry before using the markers over the paint. Hand wash only using no abrasive chemicals.
- Once you have completed your designs on your Tote bag, let it dry for at least 24 hours or longer. Turn your Tote bag inside out, then with your iron set on the highest dry not steam setting, iron the wrong side of the fabric for at least 3 mins moving the iron to prevent scorching. This will help the colours fix. If you need to clean your bag, try to spot clean it with a sponge, or hand wash with mild detergent and cool water. Some Neon colours are not as permanent as others so may fade if washed in a washing machine. We gave the motifs on our tote bag two coats Liquitex Professional Varnish - 237ml. Leave to dry inbetween coats. Then turn your bag inside out and varnish the back of the motifs, this will provide a waterproof finish.
Helpful tips…
- We used two old cardboard tubes in our wellies to aid in the painting process and to stop the wellies from folding flat, this makes painting much easier. Old rags, towels or paper would work also, just stuff them in the boot from the toe to the top.
- We used an old piece of foam board to go inside our tote bag to separate the fabric and prevent paint bleeding through the fabric.
- Shake all paints vigorously before you set them out on your palette, this will ensure the pigments and binder are mixed well. We used Winsor & Newton Disposable Tear Off Palettes (9" x 12") and it worked a treat! No mess and no cleaning!
- Don’t forget to clean your brushes straight away, acrylic paint dries waterproof and can ruin your brushes if left to dry. We used this Artists’ Brush Tub which is excellent for holding your brushes whilst you work and the ridges in the bottom of the tub are excellent for cleaning your brushes.
- Get a nice, even finish on slick surfaces like glass and metal by using a soft brush to spread out Multi-Surface paint, then leaving it to self-level.
- Use a light touch on slick surfaces for better coverage. Pressing too firmly with the brush can cause paint to slide off the surface.
- For an eggshell finish, use a high-density cosmetic sponge to tap the paint onto the surface. This technique will also give your basecoat "tooth" that makes it easier for additional coats of paint or painted designs to adhere.

We hope these tips will help you create your Festive ready wear, and we wish you happy creating! if you can share your photos with us on instagram! Under #ARTdiscountfestivalready, #colouringthenation or tag us and that would be great, we would love to see all your crafty handywork!